It's been some time since my last blog entry and a lot has happened. I started an auto shop class for homeschooled children and we've restored five VW's. These include a '65 bug, '68 bug, '71 411, '63 ragtop bug, and another '65 bug. I'll post some pictures when I get some time. In the meantime, I'm looking for another project for our next semester class. Perhaps a bus, dune buggy, or perhaps a Ford Falcon, or BMW Isseta. We have to keep our options open. By for now.
Ron (ovo)
Wednesday, May 4, 2016

Monday, May 26, 2014
Catching Up on the Past 3 Years
Here it is May 2014, almost 3 years since my last post. Where has the time gone? In July 2011, I wrote that I had picked up a set of new front suspension ball joints but had not yet installed them. Well, not long after that Blog Post, I found a shop nearby that had the tools and knowledge to get them installed. The job took four days, a press, hammer, torch, and lots of cursing. The end result is a bus that handles like a new bus again, which isn't saying much, especially in the Santa Ana winds.
A lot has happened during the past three years. I had two job changes, an aging father-in-law who needs a lot of help, and many, many family life events. Our oldest son, who has special needs, finished high school and was offered a job by a generous man at our church. This is something that I never dreamed possible. Our other two sons have been working on high school and college at the same time.
In the midst of this our middle son started driving, so we picked up a '64 bug in December 2012 that needed a lot of work. Of course it didn't run, so we had to tow it home. Over the past 1 1/2 years, we've gone through the whole car from front to back, rebuilding, replacing, and refurbishing everything. The car's engine, an original 1200cc 40hp, had never been opened up since it was assembled at the factory in 1964. The car was still (barely) 6-volts, had only minimal rust, and had been repainted (poorly) once. The interior looked as though it had seen its fair share of rodents. Besides the wear and tear mentioned, the car was in surprisingly good shape.
The restoration included everything mechanical, (engine, brakes, suspension, steering, shifting, etc.), interior upholstery, body work, paint, window rubber and trim, running boards, tires, and a whole lot more. The car now drives, stops, and looks beautifully; ready for another 50 years of service (hopefully). The only upgrades we made to the car have been a 12 volt electrical system (with Alternator), and front disk brakes for safety. The engine was rebuilt to original 40hp specs. (Its not easy to get a speeding ticket in a car with only 40hp).
Here are some photos, before and after:


Notice that it is now painted in its original L519 Bahama Blue.
As I was completing the final assembly on this beautifully restored piece of road art, I couldn't help but think that it would now be driven by a teenager, with all the pitfalls, potential dents, scratches, crashes, dings, etc. "Let it go,"I told myself. Just, "Let it go." These fine machines were meant to be driven and used.
Along with the restoration of the little '64, I also started teaching an auto shop class on Saturdays. This is done through a rather large local homeschool group. Needless to say, a couple VW's have been brought back to their glory. The first class rebuilt a '65 bug, and the second (current) class is finishing up a '68 bug. No buses, yet.
Here's a couple photos:


That's it for now. Happy bus (and bug) motoring.
Ron
A lot has happened during the past three years. I had two job changes, an aging father-in-law who needs a lot of help, and many, many family life events. Our oldest son, who has special needs, finished high school and was offered a job by a generous man at our church. This is something that I never dreamed possible. Our other two sons have been working on high school and college at the same time.
In the midst of this our middle son started driving, so we picked up a '64 bug in December 2012 that needed a lot of work. Of course it didn't run, so we had to tow it home. Over the past 1 1/2 years, we've gone through the whole car from front to back, rebuilding, replacing, and refurbishing everything. The car's engine, an original 1200cc 40hp, had never been opened up since it was assembled at the factory in 1964. The car was still (barely) 6-volts, had only minimal rust, and had been repainted (poorly) once. The interior looked as though it had seen its fair share of rodents. Besides the wear and tear mentioned, the car was in surprisingly good shape.
The restoration included everything mechanical, (engine, brakes, suspension, steering, shifting, etc.), interior upholstery, body work, paint, window rubber and trim, running boards, tires, and a whole lot more. The car now drives, stops, and looks beautifully; ready for another 50 years of service (hopefully). The only upgrades we made to the car have been a 12 volt electrical system (with Alternator), and front disk brakes for safety. The engine was rebuilt to original 40hp specs. (Its not easy to get a speeding ticket in a car with only 40hp).
Here are some photos, before and after:
Notice that it is now painted in its original L519 Bahama Blue.
As I was completing the final assembly on this beautifully restored piece of road art, I couldn't help but think that it would now be driven by a teenager, with all the pitfalls, potential dents, scratches, crashes, dings, etc. "Let it go,"I told myself. Just, "Let it go." These fine machines were meant to be driven and used.
Along with the restoration of the little '64, I also started teaching an auto shop class on Saturdays. This is done through a rather large local homeschool group. Needless to say, a couple VW's have been brought back to their glory. The first class rebuilt a '65 bug, and the second (current) class is finishing up a '68 bug. No buses, yet.
Here's a couple photos:
That's it for now. Happy bus (and bug) motoring.
Ron
Sunday, July 17, 2011
Catching Up On All The Work
I guess I should catch you all up on the bus happenings. It has been a very busy year with work, family, and various other commitments. I have not had the time to do much blog updating.
Since the last engine replacement I wrote about in December/January, I decided to rebuild the spare Type-4 2-liter engine that was sitting in parts in the garage. I took everything to the machine shop in March, where the machine shop owner told me it would be several weeks since his assistant was off work due to an injury. Conemac Machining in Canoga Park has been in business for the better part of at four decades, handed down from father to son. They have specialized in VW and Porsche engines since the beginning and do excellent work. The job took the machine shop the better part of three month, with several phone calls made to check on the status.
In late June, I finally got the call to pick up my engine. This was the first time I have actually had someone else build my engine. Rick told me all the work he had done, and that it was brought to like-new standards, with proper deck height and compression ratio, flywheel thrust clearance, etc. He upgraded the exhaust valves and all valve seats in the AMC heads, and changed the valve springs to “Hydraulic springs.” The engine looked and smelled like new.
Based on this, I decided to pull my almost new motor out of the bus and replace it with the new one. I took a day off work in mid-June and made the swap. It took about six hours of labor, but now the bus has a new motor with about 110 miles on it, with a great broken-in spare motor with about 2,000 miles. I know this must seem weird, but I have always dreamed about having a good spare motor. If a problem ever crops up, just pull out the motor, replace it with the spare, and take the time needed to do the repair while still driving the bus. Pretty cool, huh?
Anyway, that is pretty much it for now. I bought some new front suspension ball joints to replace the 252,000 ones that are groaning, but have not built up the courage to install the new ones yet. I’ll need to do it sooner than later, especially once the Santa Ana winds kick up in the fall/winter. Driving the bus in the wind on the freeway can be a scary ordeal with the worn suspension parts. I have asked around to various garages to see if they can install them, and I have researched on the Internet what the job entails. I found a ball joint tool kit at Harbor Freight, but have not made the investment yet. Perhaps once summer is over.
Happy Bus Motoring.
Ron (o v o)
Broken Exhaust Manifold Stud
Every once in a while I think to myself, "I should have left well enough alone." Last night was one of those times. I decided to change the oil, do a minor tune up and adjustment, and tighten a few bolts. It was tightening the few bolts that got me into trouble. I noticed a slight exhaust leak sound coming from the left side exhaust manifold and traced the sound to the joint at the head. I decided to tighten the nuts that hold the manifold onto the studs. Three of the four nuts tightened slightly, but as I tightened the fourth one, the stud broke off just below the level of the manifold.
Arghhhhh, and a few other choice words popped into my head. This was immediately followed by, "I should have left well enough alone."
I removed the manifold and saw that there was about an inch of stud sticking out of the head. Perhaps this was enough to grasp with a vice grip to turn the stud out. Unfortunately, I could not get the vice grip on the stud without first removing the number four cylinder push rod tubes, which meant the push rods had to come out, which meant the valve rockers had to come out, which meant the valve cover and EGR filter had to be removed. I also had to remove the warm air duct that comes from the heater valve (California model only).
Once everything was removed, I gripped the stud with the vice grips. The stud would not budge. I worked the stud numerous ways over the next two hours, even heating the stud boss with a torch to expand the aluminum. Nothing worked. I cried and gave up for the evening. Through the night, I formulated a plan to cut the stud off at the head, drill it out, and rethread the head with a tap. Fortunately, I had a spare stud. The stud is called a step stud. The head end is 9mm x 1.25mm thread pitch. The nut end is 8mm x 1.25mm thread pitch. Very hard to find. I wandered off into dream land thinking about the bus sitting unusable in the garage for the next few years before I got up the energy to remove the engine once again
Skip to this morning...Woke up, got out of bed, dragged a comb across my head. Sorry, I know that line is already taken. Plus, my hair is hi and tight I don't really need a comb. Anyway, I spend four hours doing all that I had dreamt of through the night. I drilled, and drilled, and drilled, and drilled some more. Slowly, so as to go straight and not too far. Too far would mean drilling through the valve guide, a bad and costly mistake. This drilling required serious eye protection since I was drilling up while laying on the ground underneath. One tiny piece of metal in the eye and it would mean a day wasted in the emergency room.
Once the stud was drilled, I cut it off flush with the head. There was no turning back now. Everything appear centered and straight, which was no small feat. It took about an hour just to drill the stud and leave an almost paper thin outer shell. I retrieved a 9mm x 1.25mm tap and had to fashion a long extension bar to work it into the head. The new threads were in soon and I was able to thread the new stud into the hole. Whew! That required a lot of slow patience and careful work.
Once the new stud was in, it was just a matter of re-assembling everything back together. While I was there, I re-adjusted the hydraulic valves all around to two turns past contact. Once everything was back together I fired it up and the engine came to life, quiet, smooth, and seemingly powerful. No more exhaust leaks.
In the end, this was probably one of the most frustrating times I have experienced while working on the bus, and I thought to myself over and over that I should have left it alone. But, in the end the exhaust leak was repaired and everything was put together the right way. I experienced extreme sadness, pain (cuts, burns from the torch and hot pieces, and muscle aches), relief and great joy. I guess that is what VW bus ownership is all about. The vehicle brings forth all emotions.
Happy Bus Motoring
Ron (o v o)
Saturday, February 12, 2011
Compression/Deck Height
Since the new engine was installed in December, it has been running really well. The weather has been cold and rainy. I noticed that once it was warmed up the starter had a hard time cranking it over. I made a mental note to pay more attention and initially thought about compression. Then the weather warmed up in January. We had temperatures in the mid to upper 70's, and even close to 80. Gotta love Southern California, except for the Santa Ana winds. Along with the increase in ambient temperature came some knocking noises in the engine once it was warmed up. It even had increased head temperatures, and the oil light flickered at idle after a freeway run. Argh!
When I built the engine, a machine shop owner told me not to worry about the piston to cylinder deck height since the new AMC heads had a built in raised gasket area. I measured the gasket area in relation to the thickness of the cylinder wall and decided to take his advice. The added compression gave the bus a bit more power to get up the hill.
Unfortunately, once the engine warmed up on warmer days, it appeared I had a clearance problem between the piston and cylinder head. The metal parts, especially the aluminum piston, expanded and then there was contact between the piston and cylinder head. Not enough to stop everything, but enough to cause some noise and concern. With this problem, there is no way I am going to be able to take the bus to the beach for a fishing outing.
Today after the yard work was completed, I removed the engine and tore it down to the short block. I replaced the rod bearings while the case was still together, just in case there was wear from things banging around. They looked ok, but not perfect. I had never replaced rod bearings in this manner before, so I was a little nervous, but everything worked out okay without any parts falling inside the case.
I then shimmed the cylinders and managed to get .055 inch in deck height. I reassembled everything and installed the engine just in time for Diana to get home from running her errands. I had to use a work light since the sun had set partway during the install. The engine started right up, without any hesitation by the starter motor. I sounds smooth so far, but tomorrow should tell how it runs on a warm day. The weather is expected to be sunny and 72 degrees.
Next time a machine shop owner says, "Don't worry about deck height," I think I will follow the book.
Happy Bus Motoring!
( o v o )
Ron
Thursday, January 6, 2011
Speaking of Oil!
One particularly boring rainy day, I was on-line and visiting some of my favorite informational VW bus websites when I discovered a growing number of tips on modern engine oils. There was so much information out there that I wondered how had I missed this information before. Apparently, a few years ago the motor oil industry changed the formulation of their oils to be more in line with modern air quality requirements. This included the removal of certain elements like Zinc Dialkyl-Dithio-Phosphate (ZDDP for short). Phosphates can shorten the life of the catalytic converter. The new formulation works well in modern engines with roller cam lifters and the like, but not so well in older technology engines with flat cam lifters, since the elements provide the ability for the motor oil to adhere to the metal parts, providing lubrication and separation. VW Air-cooled engines, with their old school flat cam lifters are not a good fit with the new motor oil formulations, and result in prematurely worn camshafts and lifters.
Again, how had I missed this information. This was suspiciously suspect when compared to the camshaft and cam bearing problems I have been experiencing: Cam bearings that last 5,000-10,000 miles before needing replacement. When I think back to the time my camshaft and bearing problem began, it offers much to ponder. Perhaps this was the government’s way of secretly ridding all the older cars and engines from the road in an effort to clean up the environment with newer smogless vehicles. Or, perhaps this was the automotive industry’s way of doing the same in order to sell more new cars. Maybe someone in the oil or auto industry got stuck in traffic behind a VW bus going up a steep grade and concocted an evil plot of revenge. Must research further!
Anyway, this was enough to sell me on the idea of changing my bus’s motor oil. New engine = new oil, perfect timing! Once again the informational websites pointed to “Brad Penn” Green Oil, with plenty of ZDDP for older engines (Take that, government and auto industry!) It is not easy to find locally in stores, but plenty easy on Amazon.com at $4.80 per quart. That’s okay. Even the store brands are close to that amount and if it means a longer lasting camshaft, lifters, and cam bearings, well then…
After a couple of weeks of running the Green Oil, everything seemed to be going along okay, except for the oil leak mentioned in the previous post (bad Chinese Flywheel seal). I happened to be speaking with a neighbor who has been a mechanic in the auto industry for a few decades and specializes in 1960’s American cars such as Ford Mustangs, Galaxies, and the like. He asked me what motor oil I was using in the bus and asked if I had heard of the “Zinc Problem.” He said that new motor oils were no good for older style engines because of the lack of Zinc, and that there are problems with Camshaft and Lifter wear. He said he believed it was a government conspiracy to get all the old cars off the road. I told him, “Funny you should mention that.”
Happy Bus Motoring
Ron ( o v o )
Bus your bus leak oil, or does it just mark its spot?
I decided to replace the engine in the bus in early December. I had built a new one with good parts, new AMC heads, Webcam Camshaft, used and polished standard crankshaft, reworked rods with all new bearings. I had good used pistons and cylinders, but replaced the rings with new ones. I didn't realize there is currently a worldwide shortage on VW Type 4 crankshaft bearings, but fortunately I have a couple extra sets stored away. (Word on the street is that a company is tooling up to reproduce the bearings in China - Go figure!) Crankshaft bearings that used to sell for $50-$60 are now going for up to $400, if you can find them. This is an excellent running gem of a motor, smooth, with a good power band. It should last many years - hopefully. The three month old engine is now the spare, and is also an excellent running motor.
Well, within a short time of replacing the engine, a small oil leak developed. In the old days, that would have meant immediately pulling the engine out and fixing the leak as quickly as possible. Now, given my busy work schedule, coupled with the fact I have lived with leaks for so long, I have grown accustomed to their presence (as much as it still irks). Still, new engines should not leak oil, period!
Well, within a short time of replacing the engine, a small oil leak developed. In the old days, that would have meant immediately pulling the engine out and fixing the leak as quickly as possible. Now, given my busy work schedule, coupled with the fact I have lived with leaks for so long, I have grown accustomed to their presence (as much as it still irks). Still, new engines should not leak oil, period!
This new leak was suspiciously in the area of the center and flywheel end of the engine, meaning it could be a flywheel seal, crankshaft seal, or oil galley plug seals. Type 4 VW engines are notorious for leaky oil galley plugs. That’s why, when the engine case was inspected by the machine shop, I had them remove the oil galley plugs and drill and tap the holes for threaded plugs. The thought of the possibility of one or all of these new plugs (or even one of the new seals) leaking was enough to keep me awake at night.
So, on the first Monday evening after Christmas, I pulled the engine out of the bus and removed the flywheel. The oil galley plugs were dry. What a relief. The lip of the flywheel seal was suspiciously wet. I inspected the surface of the flywheel where the seal rides and it was perfectly smooth. Not a scratch. It just did not make sense. I pulled the seal out of the engine case and inspected it. I compared it with a couple of extra new seals I had in my spare parts pox (it’s always good to have spare parts). This seal has a black outer rubberized surface, with a brown inner rubberized surface. According to the molded-in manufacture information, it was made by “Elring.” One of the extra new seals was identical. The second new seal was a bright orange rubberized seal made by Victor Reinz. The Victor Reinz seal was much thicker, and in fact was similar in thickness to the engine case surface that it is set into. The Elring seals were much thinner than the corresponding engine case surface, causing it to be possibly installed slightly “cattywampus.” Aha! Perhaps this was the problem.
I searched a couple of trusted Internet sources for information on the two seals and discovered the “Elring” seals used to be made in Germany and were considered to be of high quality. Sometime in the recent past, the company outsourced their manufacturing to China and the quality dropped significantly. In fact, several type 4 engine owners have now begun complaining that their engines leak oil because of the thin Chinese Elring seals. The Victor Reinz seals are made in Brazil. The thought that I had been taken again by cheap Chinese parts was too much to bear, and I had to take the rest of the night off.
Early the next morning (about 6:00) I was back at it. I installed the new orange Victor Reinz seal, along with a new crankshaft seal (the round O-ring inside the flywheel flange). The flywheel (five bolts torqued to 80 foot pounds) and clutch parts came next. I installed the engine and by 9:00 am, the bus was running again.
I have since driven the bus about 100 miles without a single drop of oil leaking from the engine. That hasn’t happened in years. Since cleaning up the garage floor (yes, the bus is parked in the garage while Diana’s new Honda is outside on the driveway), there is no longer the usual telltale sign that a VW even existed in the garage, err, except for the spare engine and parts, that is.
If you are tired of your VW bus marking its spot and can’t figure out the problem, try checking for the cheap Chinese flywheel seal that may be the culprit. It will make your New Year less oily, as it has mine.
I was going to post a photo of the seal, but it is a pretty boring part to look at. Please feel free to use your imagination, or visit one of the other informational Internet sources for a good view.
Happy bus motoring
Ron ( o v o )
Tuesday, September 28, 2010
Type 1 Oil Pump in Type 4 Engine
All Right! The new CV Joints came in the mail a couple days ago, and they are in and they are quiet. The job took only 35 minutes. It is amazing how smooth it can go when the parts actually work and fit right. No more junk parts.
Today, I cleaned and prepped a good used oil pump to install, hopefully tomorrow, time permitting. When I built the new engine, I installed a brand new aftermarket camshaft and cam gear, both from Webcam. The gear bolts onto the camshaft rather than using rivets like the original from VW. Because the bolts heads stick out a bit further than the rivets, the oil pump needed to be ground down just a bit so that it did not hit the bolt heads. I used a re-conditioned Type 4 oil pump, which is similar to a Type 1 pump, only the gears are internal once the pump is bolted together. The bolts on the back side of the pump needed to be ground down.
Here is the view of a Type 4 oil pump (Just happed to have an extra one to photograph):

You can see the four bolts on the back side that hold the pump body together. The are the four bolts that interfere with the new cam gear bolt heads:

The Type 4 pump works well, except that once the engine heats up and the various metal parts expand, the camshaft bolt heads have been hitting the oil pump bolts. It is not enough to seize the engine, but enough to cause vibration and noise.
The pump I prepared for installation is a Type 1 oil pump, typically used in a VW Bug motor. It will fit the Type 4 bus engine, with a little modification for the Webcam gear and camshaft. I had to grind some material off the back side, as well as make sure the pump body and cover were flat relative to one another. This was accomplished with some 600 grit wet sandpaper on a very flat surface. I used our Formica kitchen table. Don’t tell Diana. I made sure all the sanding mess was cleaned up before she even knew I was working on car parts in the kitchen. I have used this same pump before, but it leaked slightly as it was not flat. I think the sanding will work. It required that I sand the ends of the gears as well so they don’t scrap and bind on the cover.
A Type 1 pump (pictured below) is made up of several pieces. It has a pump body, gears, and cover. The gears are exposed until the cover is installed, unlike the Type 4 pump. It is a lot of work to install an oil pump in a Type 4 engine, requiring a lot of the engine parts to be removed, the engine mounts and carrier to be removed, and the engine to be supported on a jack. It is probably 2 hours of labor. I will let you know how it works.


Ron
(o v o)
Friday, September 24, 2010
Use Quality Parts
Recommendation: Do not use Chinese parts. You can use them, but expect to replace them soon. I have found this out the hard way many times, mostly with rubber parts that only last a couple of months before deteriorating. You’d think by now I would have learned my lesson, but being the cheapskate that I am, the temptation to save a few dollars is too hard to resist when faced with a decision to purchase the good German parts or the junky Chinese stuff.
Sometimes I get sucked in to buy the Chinese parts thinking I am buying German or Brazilian, only to realize the price was so good because the parts were made in China.
Case in Point: I recently found a good deal on new Constant Velocity (CV) joints on Ebay. The parts were about 25% cheaper than others I had seen elsewhere. The picture shown on the website looked like other German CV joints I have obtained in the past.
The CV Joints in the bus have lasted over 240,000 miles. I replaced the joints on the right side axle about 5,000 miles ago after hearing them start to make clunking noises while on a trip to Big Sur. I didn’t replace the left side, but made a promise to the bus to get the job done soon, hence this job.
When the new Ebay parts arrived I opened the box and immediately saw what I believed to be inferior tooling and metal used to manufacture the CV joints. It was then that I read the label on the box, “Made in China.” Well, I don’t have to tell you that I could tell they were made in China before I even read the label. Disappointment set in!
Against my better judgment, I installed the CV joints (about an hour’s labor). Installing CV joints is my least favorite job on the bus. I would rather remove and install an engine. CV joints are packed with thick black grease that seems to get everywhere. I spread layers of newspaper underneath the axle and then went to work (yuck). During the job, one of the joints came apart and several large ball bearings fell out. It took several minutes to put it back together, clean of course. 65 minutes later the axle and new joints were back in.
Then came the test drive, everything seemed to be fine except for the knocking noise coming from the rear axle, particularly the left side with the new CV joints. The good news is that it only knocks while under a load such as accelerating or climbing a mildly inclined driveway and not while coasting. For those of you who have never driven a bus before, you are pretty much driving under a load all the time! Man this sucks.
I know I should have known better than to install those pieces of trash “Made in China” car parts. Now I have to re-do the whole thing.
Why do we do this: Export all our manufacturing to China to save on labor costs and increase our business’s profits, only to have to them send us junk? We deserve it. Oh well, move forward. I just ordered a new set of German CV Joints from GoWesty. I hope they get here soon.
Happy Bus Motoring,
Ron
( o v o )
Sunday, September 19, 2010
New Roof Rack
This weekend, my brother Barry helped me build a roof rack for the Bus. Barry is an extraordinary metal fabricator and quickly cut and formed the tubular steel pieces. The bottom of the roof rack is lined with expanded sheet metal, which is welded all the way around. All the pieces were welded together into a one piece modular roof rack design that can be easily installed for a trip and then easily removed once the trip is done. It fits into the existing fiberglass luggage rack that is molded into the poptop roof, and expands the cargo carrying capacity. It will be perfect for carrying firewood, extra gas can, folding chairs, etc. I think if we took one or more of these to a VW swap meet, they would sell easily. Thanks Barry. Great job!


Ron
(o v o)
Saturday, September 11, 2010


Thursday, September 9, 2010
Great Neighbors
I have the best neighbors. They put up with my on-going bus projects on a regular basis. Perhaps they even think that if the bus were gone, the property values in the neighborhood would rise for a change. One of them calls the bus my therapy. Another one calls it my baby. A third one encourages me when I have the engine sitting on the driveway for the 12th time in a year. They probably think I’m crazy. They are truly great neighbors.
This evening when I got home from work, the sun was still up and dinner was not yet ready. Diana and the boys were working on homework. I decided to head outside to begin replacing the poptop tent on the bus. I had just received the new tent in the mail yesterday and there it sat, burning a hole in the shipping box as I waited for Saturday to arrive to install it in the bus. I could wait no longer.
My poptop is a little different than the majority of those still on the road. Most still in use on Southern California roads, were manufactured by Westfalia of Germany. The Westfalia tops are recognizable because when opened, the roof tilts at an angle. From 1968 through 1973, the front was the low end, with a luggage carrier over the rear. From 1974 on, the front was the high end, with a luggage rack over the driver cab area. My top was made by ASI of Washington and sold by Riviera of Oregon (Therefore known as a ASI/Riviera top). The entire poptop goes straight up, not in a titled manner. There is a luggage carrier over the driver cab area, and a very comfortable bed for two upstairs. To replace the tent on a Westfalia top, the top has to be removed from the bus, requiring a minimum of two people to complete the job. The tent on an ASI/Riviera top can be installed with the top in place, although some disassembly of the spring mechanism is required (as easy job for one person).
Here is my thought process. I knew that as summer is coming to a close, the days are becoming shorter with the sun setting sooner. I also knew that Diana would soon have dinner on the table and my time was limited. Yet, I found it increasingly difficult to wait any longer. I could at least remove the old tent before dinner would be ready. I decided to give it a go. Even with the limited daylight left.
The old tent took about fifteen minutes to remove. After that, I began installing the new tent. About 20 minutes into the job, the boys came out and told me that dinner was ready. This meant that Diana was saying dinner was ready and sent the boys outside to deliver the message. Now Diana and I have been married for over 22 years, and there are two words I have learned in that time that make life a whole lot smoother; “Yes dear.” I stopped the job and headed inside to dinner.
After dinner, the sun was beginning to set, so I set about in completing as much of the job as possible. I worked as fast as I could, while trying to pay attention to details so the job would get done right. The sun continued to set and I soon found myself working in the dark. I retrieved a flashlight and held it in my teeth while keeping my hands free to do the work.
Picture this, Ron standing on a ladder in the dark, flashlight in his teeth, staple gun in one hand, screwdriver drill in the other, with a partially installed poptop tent on the bus. This is what my neighbor saw as he came over to investigate my latest project. I’m sure I looked very silly. What a great neighbor. He went home and quickly returned with a clip on work light and a long extension cord. The job went a whole lot easier after that, and I was finished by 8:30. I will post some picture later after the sun returns.
Two morals of this long story: Always remember, “Yes dear.” It will mean you get to keep the bus and not have to trade it in on a Honda. The second moral is, try to stay in good will with the neighbors. It will mean the difference between working in the dark and working in the light; and they may decide not to complain about all the car repairs.
Happy Bus Motoring :-) (o v o)
Ron
This evening when I got home from work, the sun was still up and dinner was not yet ready. Diana and the boys were working on homework. I decided to head outside to begin replacing the poptop tent on the bus. I had just received the new tent in the mail yesterday and there it sat, burning a hole in the shipping box as I waited for Saturday to arrive to install it in the bus. I could wait no longer.
My poptop is a little different than the majority of those still on the road. Most still in use on Southern California roads, were manufactured by Westfalia of Germany. The Westfalia tops are recognizable because when opened, the roof tilts at an angle. From 1968 through 1973, the front was the low end, with a luggage carrier over the rear. From 1974 on, the front was the high end, with a luggage rack over the driver cab area. My top was made by ASI of Washington and sold by Riviera of Oregon (Therefore known as a ASI/Riviera top). The entire poptop goes straight up, not in a titled manner. There is a luggage carrier over the driver cab area, and a very comfortable bed for two upstairs. To replace the tent on a Westfalia top, the top has to be removed from the bus, requiring a minimum of two people to complete the job. The tent on an ASI/Riviera top can be installed with the top in place, although some disassembly of the spring mechanism is required (as easy job for one person).
Here is my thought process. I knew that as summer is coming to a close, the days are becoming shorter with the sun setting sooner. I also knew that Diana would soon have dinner on the table and my time was limited. Yet, I found it increasingly difficult to wait any longer. I could at least remove the old tent before dinner would be ready. I decided to give it a go. Even with the limited daylight left.
The old tent took about fifteen minutes to remove. After that, I began installing the new tent. About 20 minutes into the job, the boys came out and told me that dinner was ready. This meant that Diana was saying dinner was ready and sent the boys outside to deliver the message. Now Diana and I have been married for over 22 years, and there are two words I have learned in that time that make life a whole lot smoother; “Yes dear.” I stopped the job and headed inside to dinner.
After dinner, the sun was beginning to set, so I set about in completing as much of the job as possible. I worked as fast as I could, while trying to pay attention to details so the job would get done right. The sun continued to set and I soon found myself working in the dark. I retrieved a flashlight and held it in my teeth while keeping my hands free to do the work.
Picture this, Ron standing on a ladder in the dark, flashlight in his teeth, staple gun in one hand, screwdriver drill in the other, with a partially installed poptop tent on the bus. This is what my neighbor saw as he came over to investigate my latest project. I’m sure I looked very silly. What a great neighbor. He went home and quickly returned with a clip on work light and a long extension cord. The job went a whole lot easier after that, and I was finished by 8:30. I will post some picture later after the sun returns.
Two morals of this long story: Always remember, “Yes dear.” It will mean you get to keep the bus and not have to trade it in on a Honda. The second moral is, try to stay in good will with the neighbors. It will mean the difference between working in the dark and working in the light; and they may decide not to complain about all the car repairs.
Happy Bus Motoring :-) (o v o)
Ron
Tuesday, September 7, 2010
Valve Seats
About 8 years ago, I was cruising along in the Bus, heading home from a Bible study. I pulled into the driveway and turned off the key and immediately felt and heard something I had never felt or heard before. Instead of winding down to a stop, the engine came to an immediate halt. It was not a loud sound, nor an abrupt feel, but something just didn’t seem right. I tried to start it up again, but there was nothing, not even a click. I tried to turn the engine over by hand but it was frozen. My mind quickly flashed through several articles I had read about a weak point in the VW Type 4 engine; valve seats.
The air-cooled Type 4 engine was used in the VW bus from 1972 through mid 1983. It was also used in the Type 4 car (a large station wagon), the Porsche 914, and a one-year-only 1976 Porsche 912e. It is a very sturdy engine, and in fact much sturdier than the Type 1 engines used in buses prior to 1972, and in all VW bugs. The main difference is in the alloy of the engine case (that’s engine block for all you Honda owners). Other differences include beefier internal parts such as crankshaft, camshaft, rods, bearings, etc. The engine case on a Type 4 engine is made of aluminum. The Type 1 engine case is an alloy of aluminum and magnesium. Magnesium is softer, more brittle, and actually burns.

Along with the beefier parts mentioned, the Type 4 cylinder heads are noticeably sturdier. With more metal in the areas needed.


Unfortunately, the Type 4 heads have a weak point in the valve seats. This is what happens (and in fact what happened in my situation in the driveway): A valve seat is a metal ring that is pressed into the intake and exhaust valve openings of the head. The metal alloy of the valve seat is steel. Heat causes most matter to expand, while cold (the absence of heat) causes that same matter to contract. A soft aluminum cylinder head expands more than the harder steel alloy of a valve seat. As the aluminum valve hole in the cylinder head expands greater than the seat that is pressed into that hole, the seat becomes loose and can actually fall out (into the cylinder – in the direction of a piston) as the valve opens to let fuel in or exhaust out. The seat causes the valve to get stuck in an open position where it is then struck by a piston, immediately seizing the engine. This can cause all sorts of other problems such as a hole in the piston and/or bent connecting rods and crankshaft.
When I tore my engine apart, I found exactly what I just described. It was the same thing I imagined while sitting in the driveway that fateful evening. The number 4 exhaust valve seat had come loose, causing the valve to be struck by the piston, causing a good sized dent in the top of the piston, as well as a bent connecting rod. The resulting repair consisted of a complete tear down of the engine to check the crankshaft and rods for straightness. It also included replacement of a rod, pistons, cylinders, and rings, bearings, and two new Spanish made AMC heads. The repair was very expensive and time consuming.
I eventually got the bus back on the road, but read somewhere (I believe it was Jake Raby) that the AMC heads are good, but that the valve seat problems remain. Jake said he has a process of installing new valve seats that are supposed to stay put. I have logged many miles since with the AMC’s with no problems, but occasionally have it in the back of my mind that someday I may be revisiting this situation, in which case I may give Jake a call. Occasionally, I turn off the engine and listen intently for that sound and feel. So far, so good.
Happy Bus Motoring!
Ron
The air-cooled Type 4 engine was used in the VW bus from 1972 through mid 1983. It was also used in the Type 4 car (a large station wagon), the Porsche 914, and a one-year-only 1976 Porsche 912e. It is a very sturdy engine, and in fact much sturdier than the Type 1 engines used in buses prior to 1972, and in all VW bugs. The main difference is in the alloy of the engine case (that’s engine block for all you Honda owners). Other differences include beefier internal parts such as crankshaft, camshaft, rods, bearings, etc. The engine case on a Type 4 engine is made of aluminum. The Type 1 engine case is an alloy of aluminum and magnesium. Magnesium is softer, more brittle, and actually burns.
(Type 4 Engine Case)
Along with the beefier parts mentioned, the Type 4 cylinder heads are noticeably sturdier. With more metal in the areas needed.
(Inside of Type 4 Cylinder Head)
Small valve is for fuel in.
Large valve is for exhaust out.
Notice the leaks evident at the bottom of each cylinder opening (top of photo)
(outside of Type 4 Cylinder Head)
When I tore my engine apart, I found exactly what I just described. It was the same thing I imagined while sitting in the driveway that fateful evening. The number 4 exhaust valve seat had come loose, causing the valve to be struck by the piston, causing a good sized dent in the top of the piston, as well as a bent connecting rod. The resulting repair consisted of a complete tear down of the engine to check the crankshaft and rods for straightness. It also included replacement of a rod, pistons, cylinders, and rings, bearings, and two new Spanish made AMC heads. The repair was very expensive and time consuming.
I eventually got the bus back on the road, but read somewhere (I believe it was Jake Raby) that the AMC heads are good, but that the valve seat problems remain. Jake said he has a process of installing new valve seats that are supposed to stay put. I have logged many miles since with the AMC’s with no problems, but occasionally have it in the back of my mind that someday I may be revisiting this situation, in which case I may give Jake a call. Occasionally, I turn off the engine and listen intently for that sound and feel. So far, so good.
Happy Bus Motoring!
Ron
Monday, September 6, 2010
Life in the Slow Lane
If you have ever driven a VW Bus, you know what it is to hang out in the slow lane (that's the right hand lane for drivers under 30 years old). Buses do not get places quickly. They just get their in style. Sometimes, they get their after leaving a part or two behind, which has happened to me only once. I once lost a muffler while driving home from school on the US 101 freeway Fortunately, I knew it would be in the right hand lane when I went back to look for it.
Today I had to drive out to the Valley (that's the San Fernando Valley - the only real "The Valley") to replace a toilet at my inlaws' house. Being that the weather was a beautiful mid 70's and sunny, and knowing I would need a vehicle with cargo holding capacity for the new toilet, I decided to take the bus. I generally drive 60-65 mph while traveling on the freeway in the bus. The bus will go faster, and in fact I have had up to 80 for a short time (in the Nevada Desert where the CHP has no jurisdiction), but the bus cruises perfectly between 60-65 mph. Today, as before, people were generally in a hurry and I got passed by scores of other drivers. Some of them had a look of displeasure on their face as if I were holding them up from arriving yesterday at their destination. Others look and smile that smile as if perhaps they have driven a VW bus in their past. I enjoy both looks knowing that the world needs both. Of course I stick to the slow lane.
Traveling in the slow lane in Southern California can be a character builder. Traffic in many areas is a steady 70-80 mph, even though the speed limit is 65. If you let it, the slow lane can also be a place that allows you to take in the scenery and enjoy the simple pleasures of God's creation a little easier than while traveling 70-80. Sometimes that scenery is the back of a big-rig tractor-trailer while waiting for traffic to clear in order to pass. Speaking of passing, a tractor-trailer rig is one of the few vehicles you can actually pass with a VW bus, although sometimes they pass us. Timing the merger of cars entering the freeway and trying to hold a constant speed can leave you holding a death grip on the steering wheel while swearing under your breath. A few years ago, it was not uncommon for me to think ugly thoughts about others not paying attention to traffic as they merged onto the freeway. Today, it is all part of the total package of driving a bus. I smile and keep on moving along with the simple thought that it does not matter when I arrive at end of a trip so much as how I arrive.
Life in the slow lane can be a wonderful place, that is unless you are driving a Honda. Keep it slow and Enjoy the Ride :-)
Today I had to drive out to the Valley (that's the San Fernando Valley - the only real "The Valley") to replace a toilet at my inlaws' house. Being that the weather was a beautiful mid 70's and sunny, and knowing I would need a vehicle with cargo holding capacity for the new toilet, I decided to take the bus. I generally drive 60-65 mph while traveling on the freeway in the bus. The bus will go faster, and in fact I have had up to 80 for a short time (in the Nevada Desert where the CHP has no jurisdiction), but the bus cruises perfectly between 60-65 mph. Today, as before, people were generally in a hurry and I got passed by scores of other drivers. Some of them had a look of displeasure on their face as if I were holding them up from arriving yesterday at their destination. Others look and smile that smile as if perhaps they have driven a VW bus in their past. I enjoy both looks knowing that the world needs both. Of course I stick to the slow lane.
Traveling in the slow lane in Southern California can be a character builder. Traffic in many areas is a steady 70-80 mph, even though the speed limit is 65. If you let it, the slow lane can also be a place that allows you to take in the scenery and enjoy the simple pleasures of God's creation a little easier than while traveling 70-80. Sometimes that scenery is the back of a big-rig tractor-trailer while waiting for traffic to clear in order to pass. Speaking of passing, a tractor-trailer rig is one of the few vehicles you can actually pass with a VW bus, although sometimes they pass us. Timing the merger of cars entering the freeway and trying to hold a constant speed can leave you holding a death grip on the steering wheel while swearing under your breath. A few years ago, it was not uncommon for me to think ugly thoughts about others not paying attention to traffic as they merged onto the freeway. Today, it is all part of the total package of driving a bus. I smile and keep on moving along with the simple thought that it does not matter when I arrive at end of a trip so much as how I arrive.
Life in the slow lane can be a wonderful place, that is unless you are driving a Honda. Keep it slow and Enjoy the Ride :-)
Reference Material
Today, I thought I would post information about several reference books I have found useful in daignosing problems and repairing those problems. As I have no formal training in auto repair, I have had to learn by trial and error. These books (pictured below) have been a tremendous help in keeping my bus on the road. Of course I have still learned by trial and error and have had to re-do many repairs over the years.
Probably most useful has been the basic VW shop manual. This one is in good shape because I recently replaced my well worn copy with a new one:


Probably most useful has been the basic VW shop manual. This one is in good shape because I recently replaced my well worn copy with a new one:

Another good resource for VW information in general is John Muir, "How to Keep Your Volkswagen Alive, a Manual of Step by Step Procedures for the Compleat (sic) Idiot." Although there are not the detailed photographs of the Official Shop Manual, the step by step instructions are very easy to follow. Mine, pictured below, is very well worn:

The Haynes Shop Manual, picture below, is a good manual with detailed photographs and easy to follow instructions. A lot of it is a repeat of the Official Shop Manual, so I do not use it as much. Also, it is written with a British accent:

For rebuilding engines, there is no better resource than Tom Wilson's, "How to Rebuild Your Volkswagen Air-Cooled Engine." The book covers every detail from part identification by year, to removal, to tear down, to build up. It includes a chart on torque specifications, a feature that I refer to regularly. If you own a VW and plan on repairing or rebuilding your own engine, I highly recommend this book:

If you have fuel injection and am like me with very limited knowledge of the magic of the system, then I recommend, "Bosch Fuel Injection Systems" by HP Books. It does a great job of unraveling the mystery of all those little parts and wires. I have a pretty good basic understanding of the Bosch fuel injection due to the information in this book, and in fact have replaced every componant in my Bus:

Of course I have read myriads of information on the Internet on subjects related to repairing and rebuilding various componants of the VW Bus so I cannot leave this excellent resource out of this blog.
Happy Bus Motoring :-)
Ron
Saturday, August 28, 2010
Parts Sources
The bus has required many new and used parts to bring it to life and keep it healthy. I paid $400 for the bus and it was in a non-running condition. Many of the engine parts were missing and/or worn out. Most of the interior was missing. The rest was torn up. Over the years, I have discovered many Internet based sources for parts, as well as a few traditional stores and salvage yards. Below is a quick list of the more common parts sources:
www.ronsvwbus.blogspot.com
www.Wolfsburgwest.com
www.westcoastmetric.com
www.mamotorworks.com
www.busboys.com
www.cip1.com
www.countryhomecampers.com
www.gowesty.com
www.eBay.com
Roscoe's Auto Salvage - Ventura
Napa Auto Parts
Conemac Machining - Canoga Park
Rimco (Riddle Machine Company) - Santa Ana
Rancho Performance Transaxel - Fullerton
www.Wolfsburgwest.com
www.westcoastmetric.com
www.mamotorworks.com
www.busboys.com
www.cip1.com
www.countryhomecampers.com
www.gowesty.com
Roscoe's Auto Salvage - Ventura
Napa Auto Parts
www.ronsvwbus.blogspot.com
www.Wolfsburgwest.com
www.westcoastmetric.com
www.mamotorworks.com
www.busboys.com
www.cip1.com
www.countryhomecampers.com
www.gowesty.com
www.eBay.com
Roscoe's Auto Salvage - Ventura
Napa Auto Parts
Conemac Machining - Canoga Park
Rimco (Riddle Machine Company) - Santa Ana
Rancho Performance Transaxel - Fullerton
www.Wolfsburgwest.com
www.westcoastmetric.com
www.mamotorworks.com
www.busboys.com
www.cip1.com
www.countryhomecampers.com
www.gowesty.com
Roscoe's Auto Salvage - Ventura
Napa Auto Parts
Friday, August 27, 2010
More VW Bus Photos
I found a few more old photos of my Bus. The first one below was taken while camping in Mammoth Lakes in 2008. As you can see, it was a bit cold, although the bus ran well. No, I did not tow the trailer:

These next couple of photos show the bus sometime around 2007:




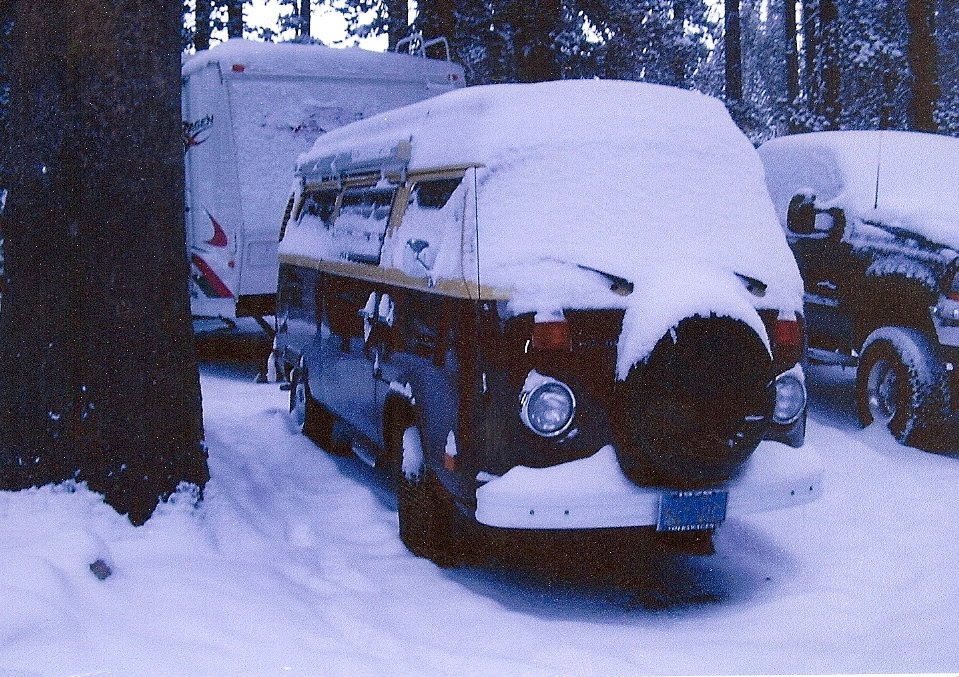
These next couple of photos show the bus sometime around 2007:


Next. some interior shots. I made the cabinets myself. The interior includes a Westfalia chest style refridgerator, stove, and sink with an RV demand pump:
In the next interior photo, you will notice the shower. Not fancy, but enough to get the beach sand off:
No bus photo montage woule be complete without a shot of the engine:
This is what it looked like a few weeks ago as the new engine and transmission were going in. I took the opportunity to replace the shift rod bushings and fuel tank hoses:
How about a bumper sticker:
Okay, that's enough for now.
Wednesday, August 25, 2010
Old Photo
Here is an old photo of the bus from 2002 before a lot of work was done to it. The boys were much younger then.

Here is another one from another trip in 2002:


Here is another one from another trip in 2002:

Tuesday, August 24, 2010
Pathos
A little bit about VW Bus ownership and life: I have owned a few VW's over the past 30 or so years, including 2 buses, and have learned a little about life. First, life and bus ownership both take maintenance. Bus maintenance means you start at the front and work your way to the back, only to start all over at the front again. In life, if something breaks or comes loose, fix it right away or the repair list gets too long to handle. A relationship with your friends, family or your bus is messy with a lot of love and hate all mixed in together. When things are smooth running, the love is evident in your stride. When you suck a valve or spin a rod bearing, heat, friction, and four letter words happen. Don't trade your friends, family, or your bus in for a Honda. You will miss out on maintenance. Keep tools nearby. You will need them. And, one last thing: VW bus ownership is a disease, for which there is no cure. So is life. None of us will make it off the earth alive. Enjoy the ride.
First Blog Entry
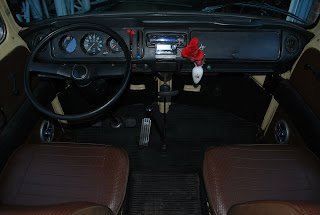
This blog is set up to chronical my experiences with my 1978 VW camper bus. It started out as a delux passenger bus, and is now a camper conversion, with a ASI/Riviera poptop, some Westfalia interior hardware such as a the refridgerator and fold out bed. The rest of the cabinetry containing sink, stove, cabinets are home built. The bus has nearly 250,000 miles, but nearly everything has been replaced and refinished. There is a new complete drivetrain down to the wheel bearings and brakes. About the only thing left to complete is a new poptop tent and front ball joints. I will post some pictures in the next few days.
Ron
Ron
Subscribe to:
Posts (Atom)